
last updated
Once you’ve created a new video and uploaded it to our Kaltura streaming server, you may wish to add chapter markers. We’d recommend this for any video longer than 5 or 6 minutes. With chapters, students can quickly navigate to the spot in the video they need to review. (How-to video follows these written instructions.)
- Log into Canvas
- Select the “My Kaltura Media” tab from the red global navigation index.
- This will show all the videos you’ve uploaded to the Kaltura server
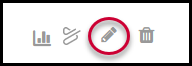
- To the right of the appropriate video, click the Edit icon, which is a pencil(see image)
- From the basic video information page, note new tools under your video
- click the button “Timeline” to display video timeline graphic
- Play your video, pausing at the location where you’d like to mark a chapter
- Click the Chapter icon (see image), add at least a title, and click Save to the right

- Play your video or drag the playhead to the next spot you wish to mark; repeat chaptering process
- Be sure to Save your changes!
This video itself is chaptered. To see how chaptering works for your students, click the “hamburger” icon at the top left to show or hide the chapter menu. Also, note that you can full-screen this video to see detail (from the double-headed arrow at the bottom right).
Note: The “hamburger” icon can be hard to see. It’s three parallel bars at the top left of the video, under the word “Adding” in the title. We recommend that you give clear instructions to your students on how to find this helpful tool.