Posted at 10:11 a.m. Sept. 27, 2016, by Carly Finkel in VoiceThread
Go to VoiceThread
- Access VoiceThread from within your LMS.
- Click on the hamburger icon (3 horizontal lines) that appears in the upper left of the VoiceThread screen
- Choose “Go to VT Home.”
Create & add media to your VoiceThread
- Click the “Create” button in the upper lefthand corner of the site.
- An area to “Add media” will appear in the center of the screen. You can drag and drop files here or click to browse your hard drive.
- If you click on “Add media,” you should then choose “My computer” from the sources that appear.
- You can choose add many types of files here: PowerPoints, PDFs, Word documents, videos, etc
- A box will pop up called “Thread Settings.” Enter a title of your VoiceThread in the “Title” bar; then, click Save.
- You will then be taken to a screen that displays thumbnails of the media you’ve added. If you’d like to change the order of the thumbnails, you can drag and drop them into the order in which you’d like them to appear.
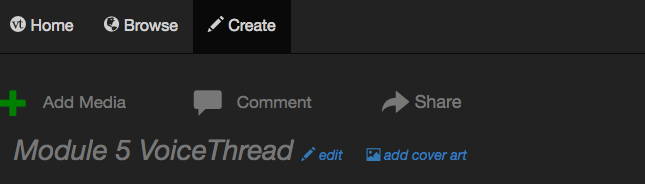
- If you’d like to add more files to your VoiceThread, click the “+Add Media” button in the upper lefthand corner (see image below).
Add comments and/or narration to your VoiceThread
- Once you’ve finished adding media to your VoiceThread, you should add comments to each of the “slides” providing instructions to the students or your own audio narration of slide content. You can begin this process by clicking on the “Comment” button in the upper lefthand portion of the page (above your VoiceThread title- see image above).
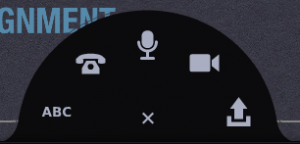
- After clicking on the Comment button, the first slide of your VoiceThread will appear on your screen. Click on the plus sign tab at the bottom-center of the screen.
- The commenting options will appear. Click:
- the “ABC” icon to add a text comment
- the microphone icon to add an audio comment
- the camera icon to add a video comment
- If you’re adding an audio or video comment, VoiceThread will allow you to preview the comment before choosing to Save, which posts the comment.
- Use the < and > arrows in the lower right hand corner of the screen to navigate through your slides and add comments where you’d like.
- When you’re finished adding comments to the VoiceThread, you can click the X button in the upper righthand corner to be brought back to the main editing screen.
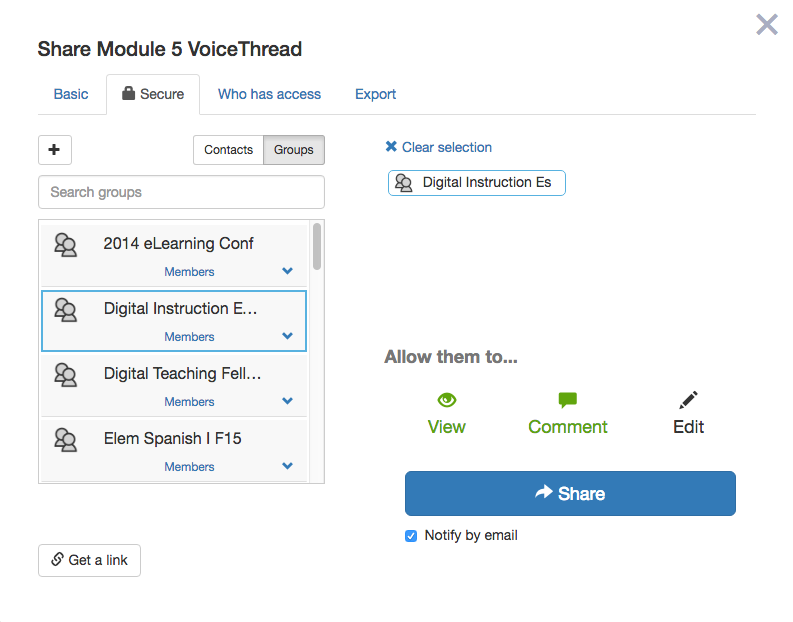
Share your VoiceThread with the class
- Click on the “Share” button in the upper left (above your VoiceThread title).
- Find your class in the list that appears and click on it.
- After selecting your class, choose what you would like students to do on the right. The default is that students can view and comment on the VoiceThread. You can also give students editing access by clicking on the pencil icon (green icons mean that students have access to this function).
- Click the blue Share button.